
iPad FeaturesMost of the familiar interface screens are now shown as 'popover' screens that allow you to continue viewing the Bible as you interact with other parts of the interface. More interface changes and features will be coming in the near future to utilize the extra screen size on the iPad. |


|
Main ScreenMain viewing screen When BibleScope first launches, this is the main reading screen that is shown. From here you can get to all the other different functions within BibleScope. Pressing the screen anywhere will toggle the menu bars visible/hidden. If you press the very right hand side, there is a quick shortcut so you can jump to any verse on the page Bottom menu bar
Very top menu bar
Top bar below the title menu bar
|


|
Selecting the book/chapter/verseTable selection view You can choose the book and chapter easily by selecting the far left button on the bottom bar. This will bring up the first screen shown below. From here you can select the book which will show you the chapters available to select, and from there the verse #. History Alternatively you can also press the History button to see the list of the last locations in the Bible you have navigated to. Any time you select a book and chapter from the book/chapter selection screen, or a bookmark, or a search result it will be added to the history. |


|
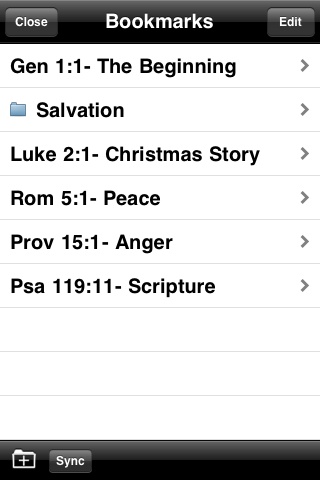
Bookmarks2 ways to get to Bookmarks Bookmarks are used to quickly jump to a saved location in the Bible. You can access them 2 ways: First by clicking the button all the way on the right on the bottom bar, or by selecting a verse number in the actual Bible text on the screen. Selecting a verse number and then selecting the Add Bookmark choice will allow you to add this location as a bookmark and let you enter a title for the bookmark. From the main bookmark list, shown to the right, you can delete a bookmark, or edit the title by pressing the Edit button on the top right. Pressing the little folder button at the bottom will add a new Folder where you can organize your bookmarks better. Backing up bookmarks and syncing You can back up your bookmarks with my server in case you ever need to reinstall from scratch, or ever have to delete the app from your device. To back up your bookmarks, do the following:
|


|
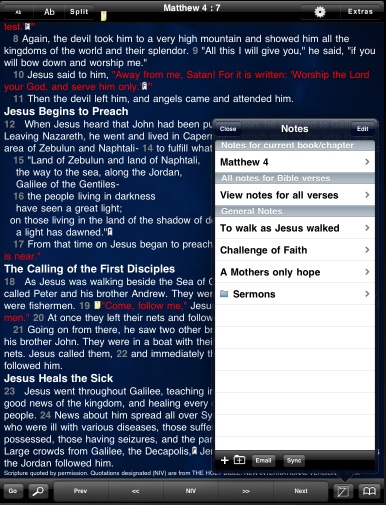
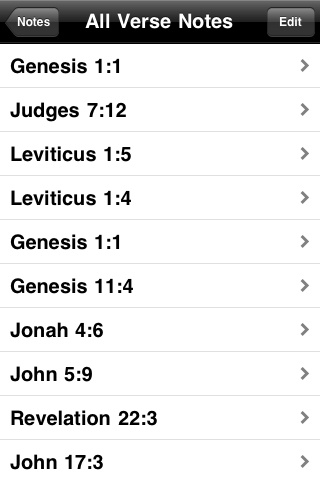
Notes2 ways to get to Notes Notes can be added to either a verse, or you can add loose notes for general note taking that don't correspond to a single Bible reference Adding note to a verse To add a note to a verse, select the verse number on the main Bible reading screen. From there you can add a new note, or edit an existing one. Adding general note Once on the main notes page (as shown at right, first picture) you can add a new general note by clicking the '+' button at the bottom, or you can edit any existing notes by selecting them. General notes are for notes that are not attached to a particular verse. So they could be a Sunday sermon or devotional. Pressing the little folder button at the bottom will add a new Folder where you can organize your general notes even better. List of notes for verses Now in the area above the General notes are the notes for verses. The first section will take you to a list of all the notes you have for that chapter. The middle section will take you to a list of all notes you have taken throughout the Bible. After selecting one of the first two sections, it will take you to a list page such as the one shown to the right. On this screen, you can edit the note by just selecting it, or delete a note by pressing the 'Edit' button. Backing up notes and syncing You can back up your notes with my server in case you ever need to reinstall from scratch, or ever have to delete the app from your device. To back up your notes, do the following:
Editing Notes on server It is now possible to edit your notes from a web interface. This lets you more easily edit or create long notes since you can copy and paste from other applications on your computer. You can then sync up with the device by following the above instructions for Syncing. To use this feature, click the Member Login link at the very top right of this page. |

|
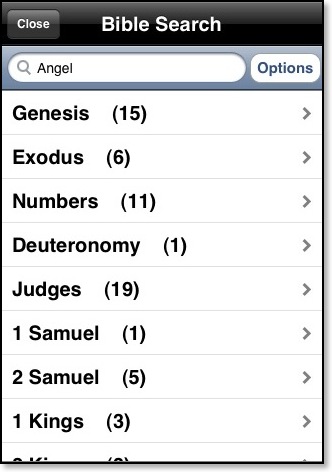
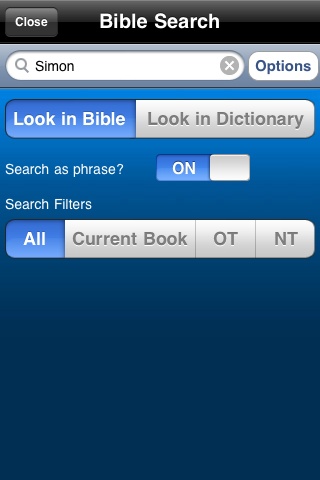
SearchKeyword search Searches can be done by clicking the second button from the left on the bottom bar. Enter a search term in the search box above, then click the Search button on the keyboard screen. After selecting the book from the list of search results, click the verse to jump to that verse in the Bible Search Options You can choose to only search in the current book, or the Old or New testament by pressing the Options button. The Search Options screen is shown allowing you to customize the search parameters Search Easton's Dictionary You can also search in a built in dictionary (Easton's Bible dictionary) by selecting the 'Options' button and selecting the Dictionary option. Then search for a term. From the list of entries in the dictionary you can choose one to see the details, as shown in the image to the right |


|
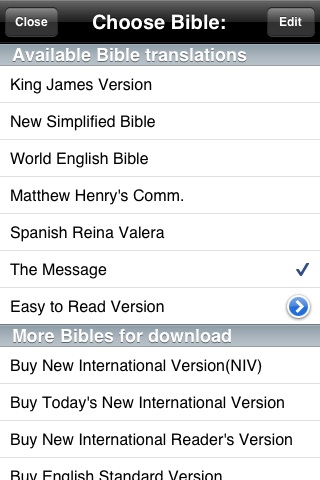
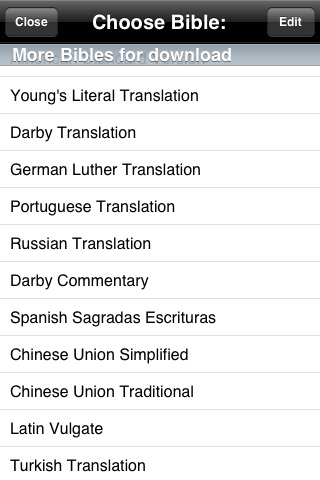
Bible translation screen
Included translations
There are many Bible translations available in BibleScope, and it couldn't be easier to use them. On the main screen, press the middle button on the bottom bar to see the list of available translations. Many are available immediately within the app and don't require an internet connection.
Available for download (many free, some paid)
There are also some that are in the second section of the list that you can download. Most of these translations are free, and a few are available for purchase from within BibleScope including the NIV, ESV, NASB, HCSB, and PDT. Just select a translation to switch to that version, or to download it if its one for download. You can delete any Bibles that you have downloaded by pressing the 'Edit' button.


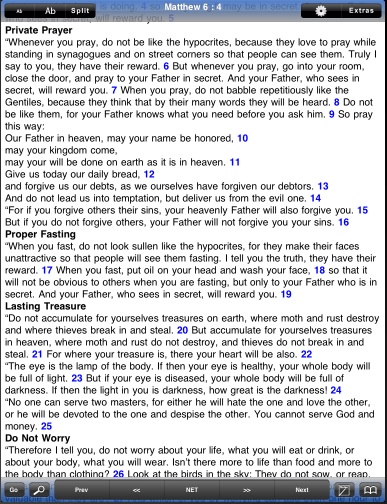
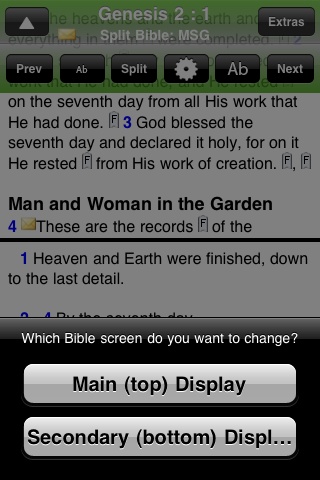
Splitscreen modeView 2 translations simultaneously You can view 2 translations at the same time by pressing the down arrow at the top right and press the Split button. To choose what translation is shown at the bottom, press the bottom middle button. You are then given the choice to change the top or bottom translation. Landscape mode When you are in landscape mode, and you also have the split screen visible, then the 2 views will be side-by side instead of on top of each other. |


|
Landscape ModeWhen the iPhone/iPod Touch is in the landscape position (sideways) the whole UI will autorotate. When you also have the split screen visible, then the 2 views will be side-by side instead of on top of each other when you are in portrait mode. |


|
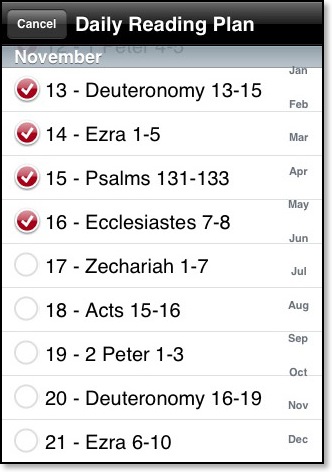
Daily Reading PlanThere is a Bible Reading plan inside of BibleScope by pressing the 'Extras' button on the top right, then clicking the first button called Daily Reading Plan. It starts off by bringing you to the current day and lists the chapters needed to read for that day. The plan will alternate the chapters so you get a varied selection from the scriptures. You can check off each day as you complete them, allowing you to see which ones you missed and to catch up with the missed reading sections. When you are done with a days reading just click the little circle next to the day to check it done. Alternate reading plan You can also use a more straight-forward reading plan that starts in Genesis and goes through to Revelation by going to the Settings screen in BibleScope, and changing the option called'Daily Reading Plan Mode' Devotional reading There are 3 other devotional options here:
|
|


Customization and SettingsBibleScope is extremely customizable. You change the background, font color, font style, verse color, verse style, colors for the UI bars, and more. On the main screen, press the top left button (down arrow) to show the secondary UI bar. Main font size Main font size - On this bar, press the 'Ab' buttons to change the font size. All the other settings Press the icon that looks like a gear on this bar to show the main Settings screen.
Verse display and color Font type and style More settings |
|